Introduction and Understanding Crème Brûlée
What is Crème Brûlée?
Crème brûlée, often known as the king of desserts, is a delicate custard with a hard caramelized sugar topping. This classic French treat combines silky smooth custard with the crunch of burnt sugar, creating a satisfying contrast of textures.Crème Brûlée loved for its simplicity and elegance, but don’t be fooled—perfecting this dessert takes a little finesse.
The custard base, typically made with cream, sugar, and egg yolks, is gently baked until set. The pièce de résistance, however, is the layer of sugar melted and crisped to perfection right before serving. This golden crust not only adds flavor but also elevates the dessert’s visual appeal.
The Importance of Caramelization in Crème Brûlée
Caramelization isn’t just a fancy term—it’s the heart of what makes brûlée so unique. When sugar is exposed to high heat, it undergoes a chemical transformation, turning golden brown and developing complex flavors ranging from nutty to toasty.
But here’s the kicker: caramelization is all about balance. Too little heat, and you’ll end up with soggy sugar. Too much, and you’ll scorch it, leaving a bitter taste. Achieving that perfect caramelized brûlée crust involves understanding the science of sugar and the tools that help you control the process.
The Science and Tools Behind Caramelization
The Science of Sugar Caramelization
Caramelization is a fascinating process that transforms ordinary sugar into a golden masterpiece. When sugar is heated above 320°F (160°C), its molecules begin to break down, producing a cascade of complex flavors and colors. This process, known as the Maillard reaction’s sweeter cousin, is what gives crème brûlée its signature caramelized crust.
What makes it magical? As sugar melts, it first turns into a clear syrup before deepening into a rich amber hue. The longer you heat it, the darker and more robust the flavors become. However, timing is everything! Overdo it, and you risk burning the sugar, resulting in an unpalatable bitterness.
For a perfect caramelized brûlée crust, precision and patience are key. Using the right tools ensures you can control the heat and caramelization process effectively.
Essential Tools for Caramelizing Crème Brûlée
To achieve that iconic caramelized layer, you’ll need the right equipment. Each tool plays a crucial role, whether you’re torching the sugar to perfection or using alternative methods for even heat distribution.
Choosing the Right Torch for Caramelization

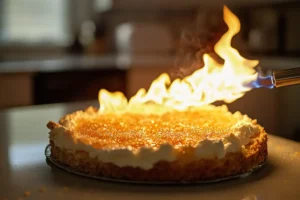
A kitchen torch is your best friend when caramelizing brûlée. This handheld device delivers a concentrated flame, allowing you to melt sugar with pinpoint precision. When selecting a torch, look for one with adjustable settings to control the flame’s intensity. Some torches come with safety locks and refillable canisters, making them convenient and durable for home use.
Using a torch gives you complete control over the caramelization process. Move it in slow, circular motions over the sugar for even browning. But beware! Holding the flame too close or too long in one spot can result in scorching.
Alternative Tools: Broilers and Their Effectiveness
Don’t have a kitchen torch? No worries! A broiler can be an excellent substitute. Set your oven to the highest broiling setting and place your custard dishes on the top rack. This method works best for larger batches but requires careful attention.
The heat from a broiler isn’t as targeted as a torch, which means achieving uniform caramelization can be tricky. Rotating the dishes halfway through can help distribute the heat evenly. Remember to use heat-resistant ramekins to prevent cracking under high temperatures.
By mastering these tools and understanding the science behind caramelization, you’re well on your way to crafting a crème brûlée that’s as visually stunning as it is delicious.
Step-by-Step Guide to Caramelizing Crème Brûlée
Preparing the Custard Base
Before you can achieve the perfect caramelized brûlée, the foundation must be flawless. The custard base is a creamy blend of egg yolks, sugar, and heavy cream, often flavored with vanilla or other subtle notes. Here’s how to prepare it like a pro:
- Step 1: Preheat your oven to 325°F (160°C).
- Step 2: Whisk together egg yolks and sugar until the mixture is pale and slightly thickened. This ensures a smooth, velvety texture.
- Step 3: Heat the cream in a saucepan until it just begins to simmer, then slowly pour it into the egg mixture while whisking continuously.
- Step 4: Strain the custard to remove any lumps and pour it into ramekins.
- Step 5: Place the ramekins in a deep baking dish, and fill the dish with hot water until it reaches halfway up the ramekins. Bake until the custard is set but still jiggles slightly in the center.
Once baked, chill the custards in the refrigerator for at least 4 hours (or overnight). The colder the custard, the better it will withstand the heat during caramelization.
Selecting the Appropriate Sugar for Caramelization
Not all sugars are created equal when it comes to caramelizing crème brûlée. Granulated white sugar is the go-to choice for achieving an even, golden crust. Its fine texture spreads smoothly, ensuring consistent caramelization.
For added flavor complexity, you can experiment with superfine sugar, which melts faster and produces a slightly thinner crust. Avoid using powdered sugar, as it can burn too quickly and leave a bitter aftertaste.
Pro Tip: Use just enough sugar to coat the custard in a thin, even layer. A thick layer may not caramelize uniformly, while too little sugar could result in uneven browning.
Techniques for Caramelizing Using a Kitchen Torch
The torch method is by far the most reliable way to achieve that quintessential sugar crust. Follow these steps for a picture-perfect brûlée:
- Sprinkle an even layer of sugar over the chilled custard. Tilt the ramekin to spread the sugar evenly, tapping off any excess.
- Light your kitchen torch and set it to a medium flame. Hold the torch about 2 inches above the sugar surface.
- Move the torch in small, circular motions, focusing on one area at a time until the sugar melts and turns golden brown.
- Allow the caramelized crust to cool for a minute or two before serving. This gives it time to harden and develop that satisfying crunch.
Caramelizing Crème Brûlée Without a Torch
No torch? No problem! You can still create a delicious caramelized crust using your oven’s broiler. Here’s how:
- Preheat the broiler to its highest setting.
- Place the ramekins on a baking sheet, ensuring they’re positioned close to the broiler’s heat source.
- Sprinkle a thin, even layer of sugar on the custards and place the baking sheet on the top rack.
- Broil for 3–5 minutes, watching closely as the sugar melts and browns. Rotate the ramekins halfway through to ensure even caramelization.
Although the broiler method takes slightly longer and requires careful monitoring, it’s an effective alternative for those without a torch.
By following these steps, you’ll master the art of caramelizing crème brûlée, creating a dessert that’s as delightful to eat as it is to admire.
Advanced Techniques and Troubleshooting
Advanced Caramelization Techniques To Caramelizing Crème Brûlée
Once you’ve mastered the basics, it’s time to elevate your crème brûlée game. Advanced techniques can help you achieve a more refined and professional finish, impressing even the toughest critics.
Achieving Uniform Caramelization
Creating a uniformly caramelized crust isn’t just about skill; it’s also about technique. One trick is to tilt the ramekin slightly as you torch the sugar, ensuring the heat spreads evenly across the surface. This prevents over-caramelizing certain spots while leaving others untouched.
Another option is to use superfine sugar, which melts and caramelizes more evenly due to its smaller granules. Pair this with a slow, controlled torching motion, and you’ll be rewarded with a flawless, glass-like crust that cracks beautifully under a spoon.
Infusing Flavors into the Sugar Topping
For a creative twist, consider infusing your sugar with subtle flavors before caramelizing. Here are a few ideas:
- Vanilla Sugar: Mix granulated sugar with a touch of vanilla bean seeds for a fragrant aroma.
- Citrus Sugar: Add finely grated lemon or orange zest for a zesty flair.
- Spiced Sugar: Incorporate a pinch of cinnamon or nutmeg for a warm, cozy taste.
To infuse the sugar, combine your chosen flavoring with the sugar in a sealed container and let it sit for a day or two. When ready, use the flavored sugar to create a unique caramelized topping that delights the senses.
Common Mistakes and How to Avoid Them to caramelize brûlée
Even seasoned bakers can run into hiccups while caramelizing crème brûlée. Here’s how to troubleshoot some of the most common issues:
1. Burnt Sugar Crust
If your sugar turns dark brown or black, the flame may have been too close, or you left the broiler on too long. Always keep the torch at a safe distance (about 2 inches) and move it constantly to avoid burning.
2. Uneven Caramelization
Uneven browning often occurs when the sugar layer is too thick or unevenly spread. Use a fine-mesh strainer to sprinkle sugar uniformly, and tap off any excess before caramelizing.
3. Wet or Sticky Sugar
A wet crust indicates that the sugar didn’t caramelize properly. This can happen if the custard wasn’t chilled thoroughly before torching. Ensure the custards are ice-cold to prevent heat from melting the sugar before it caramelizes.
4. Cracked Custard
Cracked custard can occur when the broiler or torch generates excessive heat too quickly. To avoid this, use a gentle, gradual torching technique or keep the ramekins at a safe distance from the broiler.
By mastering these advanced techniques and avoiding common pitfalls, you’ll take your caramelized brûlée skills to new heights, leaving your guests in awe of your culinary prowess.
Serving and Enhancing the Crème Brûlée Experience
Serving Crème Brûlée: Tips for Presentation of caramelize brûlée

A perfectly caramelized crème brûlée isn’t just about taste; presentation plays a key role in elevating the dining experience. Here’s how to serve this dessert like a pro:
- Choose Elegant Ramekins: Opt for ramekins with a sleek, minimalist design or colorful ceramic finishes to make your dessert visually appealing.
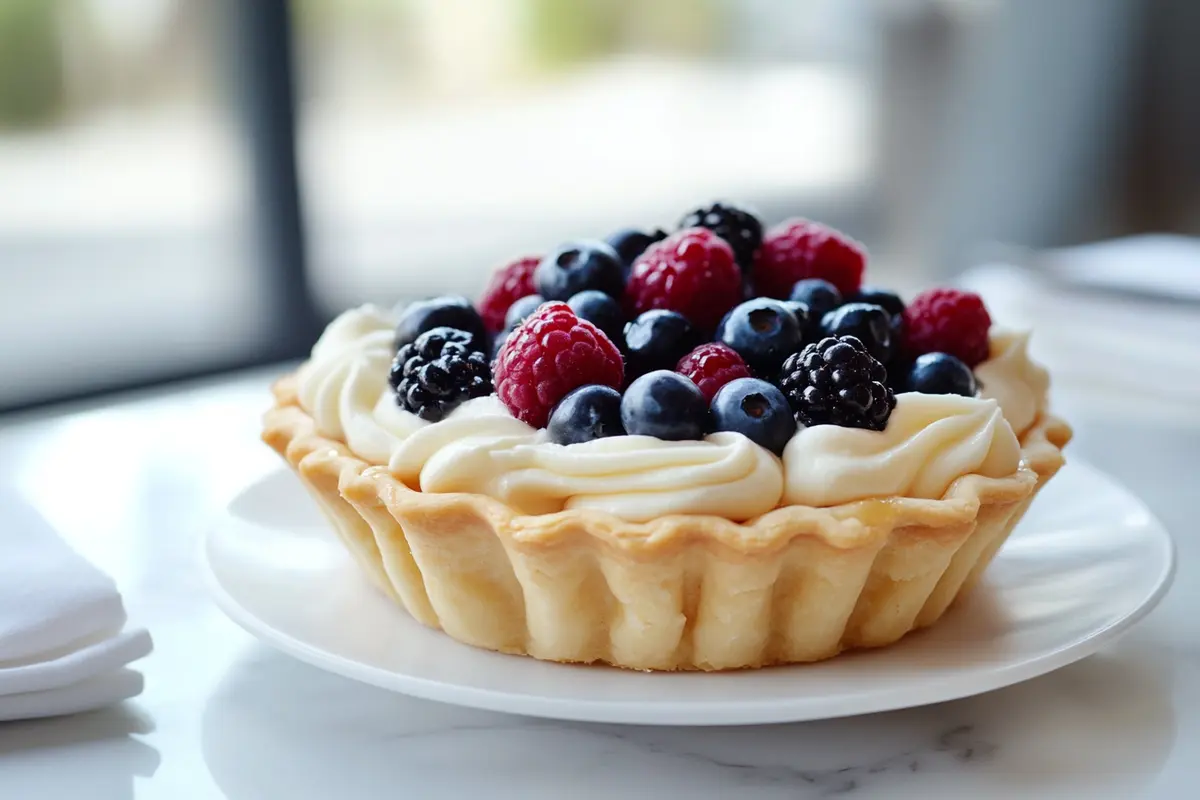
- Add Garnishes: A sprinkle of powdered sugar, a few fresh berries, or a sprig of mint can provide a pop of color and sophistication. Avoid overloading the garnishes to keep the focus on the golden sugar crust.
- Use Stylish Serving Plates: Place the ramekin on a decorative plate and add a small dessert spoon to complete the look. A textured or patterned plate can contrast beautifully with the smooth custard and caramelized top.
Pairing Crème Brûlée with Complementary Desserts
Why stop at one dessert? Pairing crème brûlée with other sweets can create a memorable culinary experience. Here are some pairing ideas:
- Chocolate Truffles: The richness of chocolate complements the creamy custard and crackling sugar crust.
- Fruit Tarts: A tart, tangy fruit dessert contrasts wonderfully with the sweetness of crème brûlée.
- Shortbread Cookies: The buttery, crumbly texture of shortbread offers an additional layer of texture to the meal.
You can also serve crème brûlée alongside coffee or tea, enhancing its warmth and elegance.
Frequently Asked Questions About caramelizing Crème Brûlée
Yes, but brown sugar caramelizes more quickly due to its molasses content. If you choose to use it, keep a close eye on the process to avoid burning.
You can use your oven’s broiler. Just place the ramekins close to the broiler’s heat source and watch carefully as the sugar caramelizes.
Absolutely! You can prepare the custard a day ahead and refrigerate it. Caramelize the sugar topping just before serving to maintain its crispness.
By focusing on presentation and pairing, you’ll elevate crème brûlée from a delicious dessert to a full sensory experience that delights both the eyes and the palate.
This could be due to underbaking or an incorrect custard-to-liquid ratio. Ensure you bake the custard at the right temperature and chill it thoroughly before serving.
Conclusion
Creating the perfect crème brûlée is a rewarding culinary adventure that combines science, artistry, and a touch of patience. From preparing a smooth, creamy custard base to mastering the delicate balance of caramelizing sugar, each step plays a vital role in achieving that iconic golden crust.
By understanding the tools, techniques, and potential pitfalls, you can create a dessert that not only looks stunning but tastes divine. Whether you’re a beginner torching your first sugar topping or an experienced chef experimenting with infused flavors, the journey to mastering caramelized brûlée is as delightful as the dessert itself.
So, the next time you prepare this classic treat, remember: a little finesse and creativity go a long way. Serve it with confidence, and enjoy the smiles that follow as your guests break into that crackling sugar crust to reveal the velvety custard beneath. Now, it’s time to take what you’ve learned and create your own masterpiece—bon appétit!
For more inspiration and creative ideas, don’t miss our latest article:”Crab Brulee“. It’s packed with fresh recipes and tips to make your cooking experience even more enjoyable!”

